Tag Archives: design

Walking My Way In

I spent the last several days thinking and talking about leadership and the pathways that lead to and open into leadership opportunities—particularly in a writing project context. Settled in the rustic natural beauty of the hills outside Austin, I did a lot of walking, and talking, and thinking.

img_8837

In the educational community, many teachers doubt their leadership—especially if it is situated outside of the classroom. Leadership feels like something bestowed, it comes with a recognizable title, and it means telling others what to do.

But in so many ways, my own experiences with leadership have involved making and doing. It has been about invitations that carry with them a sense of belief that I have something to offer—maybe something I haven’t yet recognized in myself. It has been about saying yes even when I wasn’t sure of what saying yes meant.

And like this weekend, sometimes I walk behind someone else, noticing the footsteps, watching where they sidestep the boggy places and climb over the branches.

img_8850

Sometimes I break the trail, exploring through my feet on the ground, listening to the sounds around me, noting the running water and the squirrel that runs overhead. When I feel lost (and that definitely happens!), I stop to look and listen. What happened to my path? Can I find it again…or make my own in the moment? And there are times when I simply have to backtrack, retracing the steps I already took.

img_8876

So I know how to support new leaders in the ways I have been supported to grow as a leader. But how do we recognize and make spaces for leaders with abilities and knowledge different from our own?

How do we make spaces so their leadership can take root and grow outside the groomed planter boxes that are easily recognizable?

img_8818

All that walking and talking has me contemplating possibilities, and is lighting the fires of design thinking.  I’m looking forward to gathering a team at our writing project site to considering alternatives that will include those who haven’t found our typical entry points, creating new access–hopefully for those who bring talents and perspectives currently missing from our conversations and our planning.

img_8874

I’m walking my way in to new understandings…and I hope that will also open up new pathways for others to walk their way into leadership at our site, enriching and expanding our community of learners and leaders.


Lighting Up Writing and Art: a Design Challenge

My students love a project!  Project communicates to them that they will be doing some making, some designing, some problem solving, and probably a good bit of collaborating.  They also know that projects are about sustained time to create something they will value…and likely, others will too.

The project they did last week comes from 21st Century Notebooking: work I have done in collaboration with Paul Oh of the National Writing Project, Jennifer Dick of Nexmap, and David Cole of CV2.   I’ve had a few opportunities to explore the possibilities of “lighting up” my writing and art–and knew right away that my students would both love the opportunity and learn a lot from working with circuits and writing and art.  I feel fortunate to have the chance to pilot the use of LED stickers with my students and explore the ways a project like this works with young students (grades 1, 2, and 3).

On Monday we started with a pre-assessment to document what my students already knew about circuits and electricity (not much) and then to read a picture book to give them a bit of background knowledge about how electricity and circuits work.  We read Switch On, Switch Off by Melvin Berger to give students an overview of electricity and circuits.  And while the book is a bit dated, it did pique students’ interest and generated lots and lots of questions.  “Breaks” in circuits in conjunction with switches created lots of confusion!

On Tuesday we began talking about how light might impact a piece of writing and art.  I showed students examples that I had created and then they began to brainstorm other possibilities…focusing on topics and things they cared about.  They were invited to come up with at least four possibilities and began sketching them in their writer’s notebooks.

Just this small selection shows the variety of ideas…and students were eagerly discussing not only what they would draw, but also what they would write.  And in typical fashion they were already questioning whether they had to write in the format I had written (I had written a Haiku as my example) or if they could write in some other way.  For me, this was a demonstration of the ownership they were already feeling as the creative juices flowed.

On Wednesday, students were asked to commit to a design and draw it on their folded booklet. Then I showed them how to draw a circuit diagram on the inside of their booklet that would allow them to put the light(s) where they wanted them to shine through.

circuit diagram

series diagram

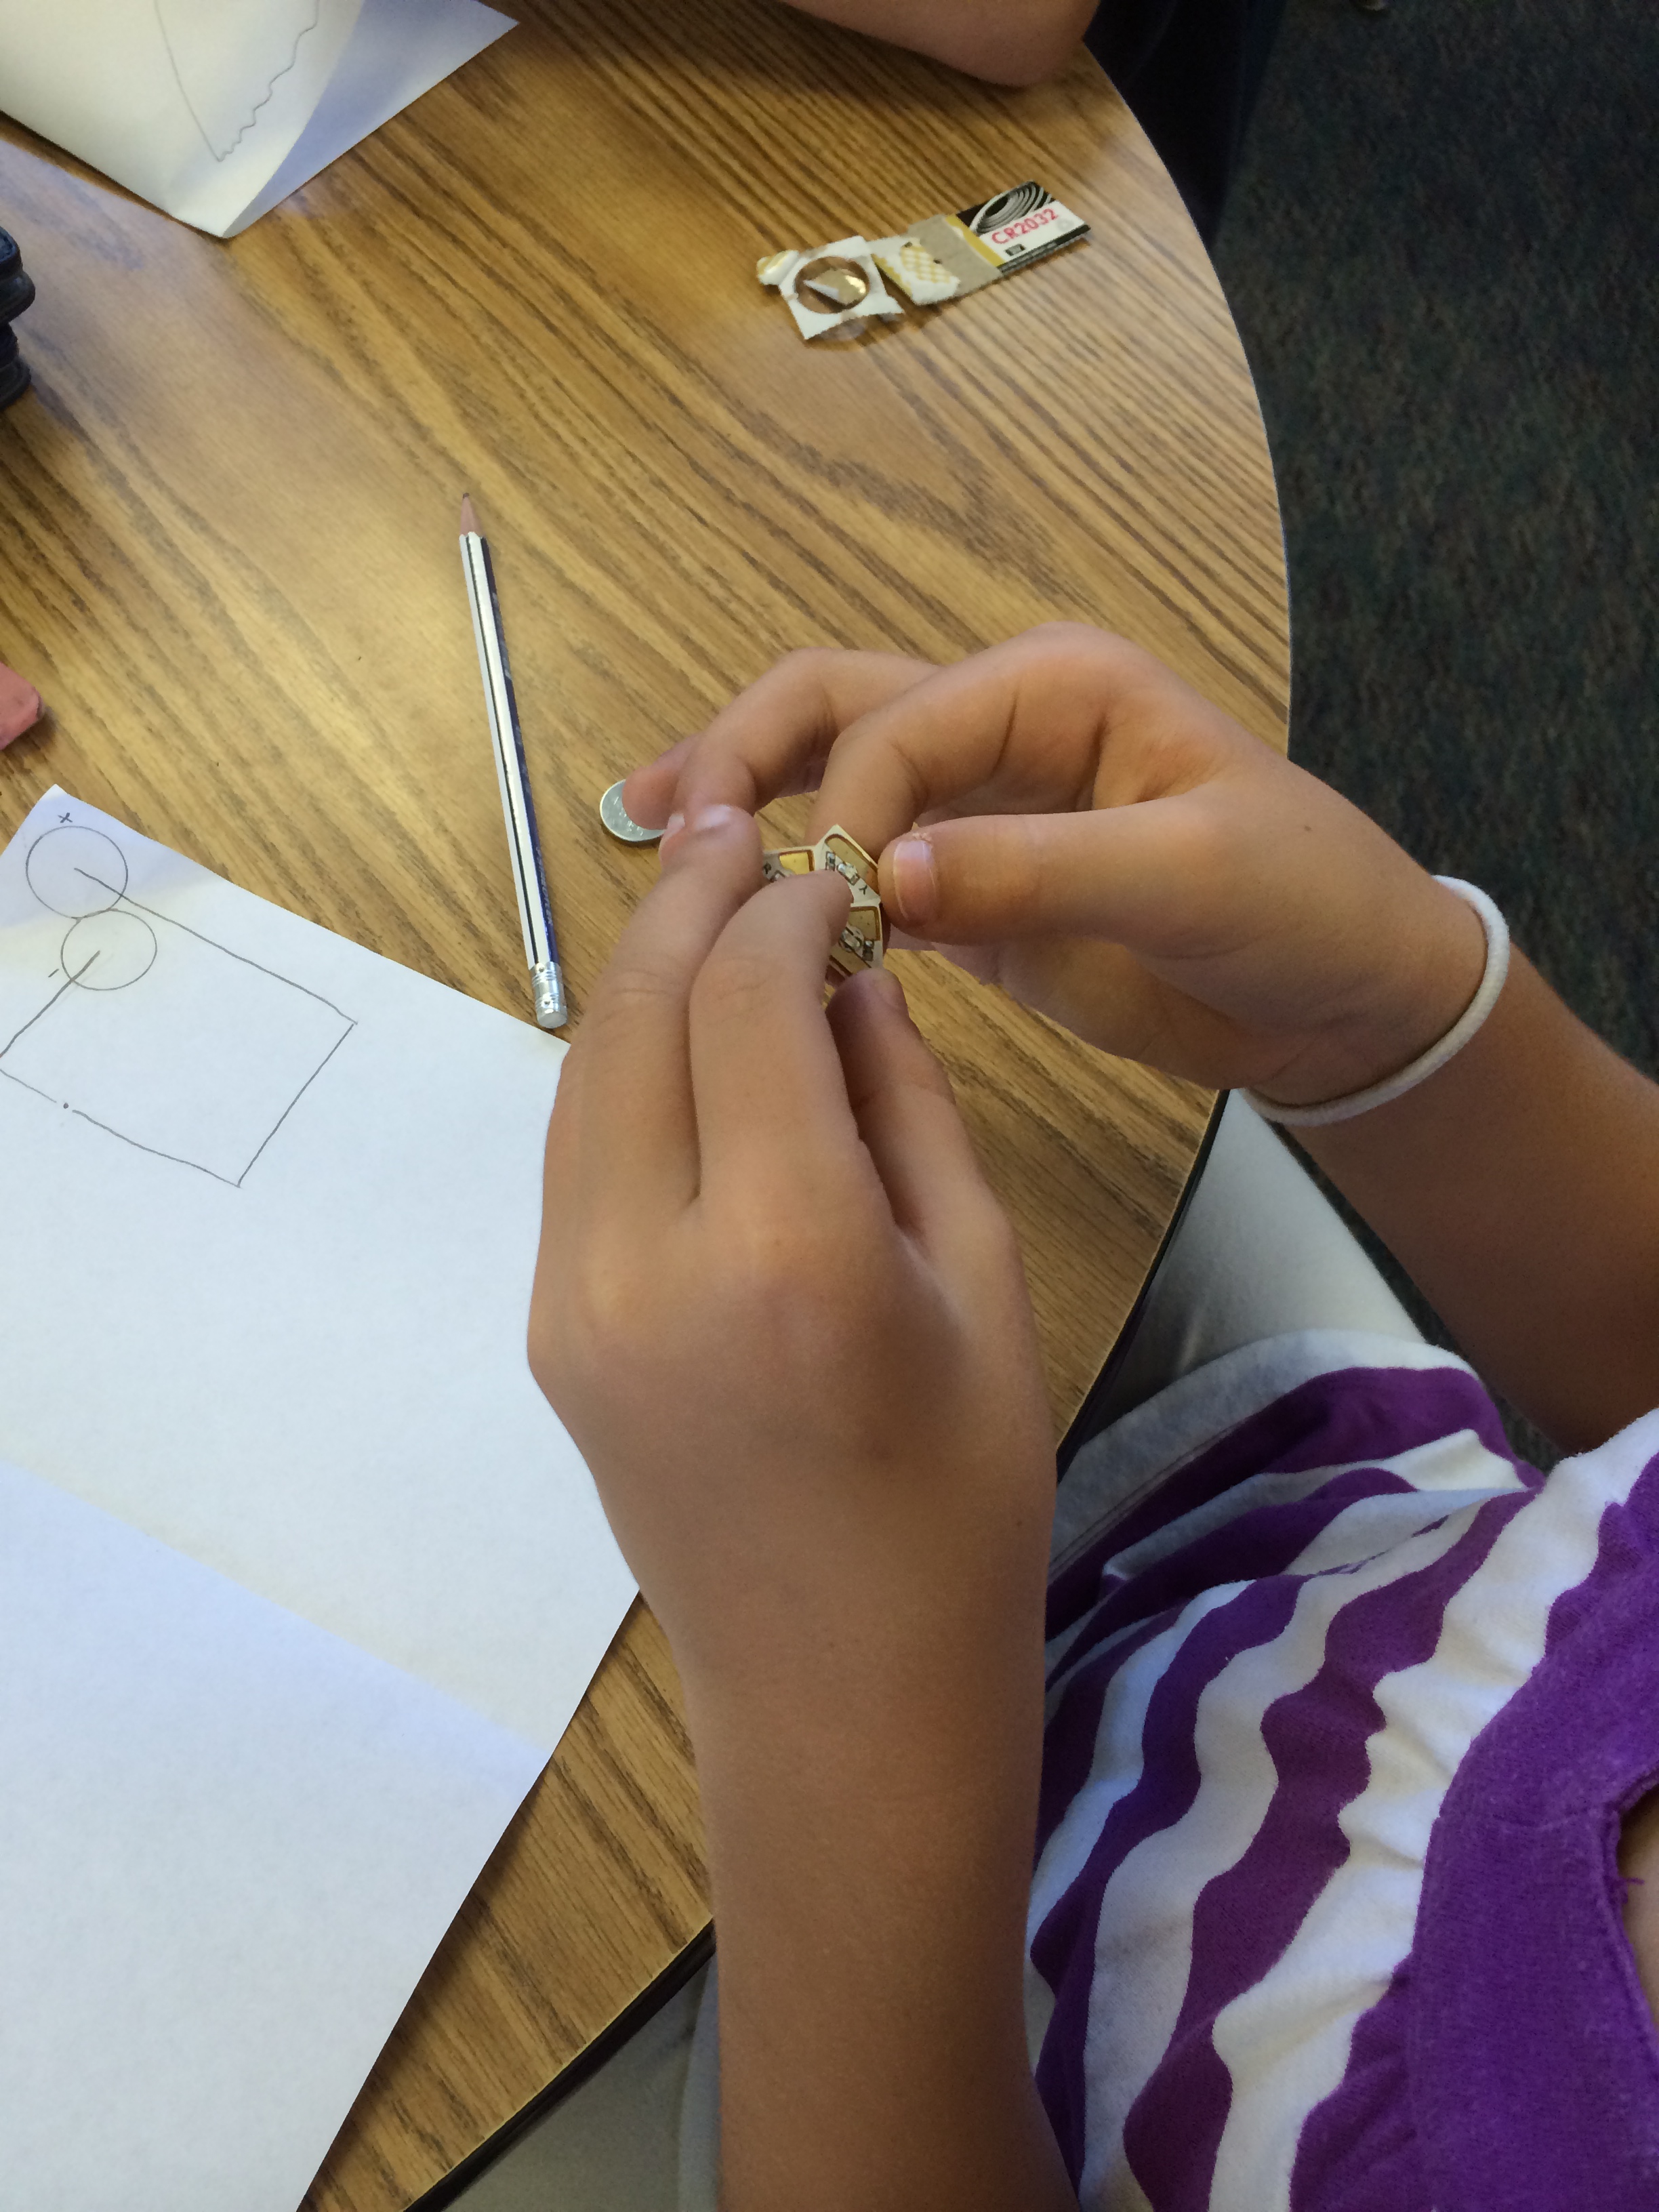
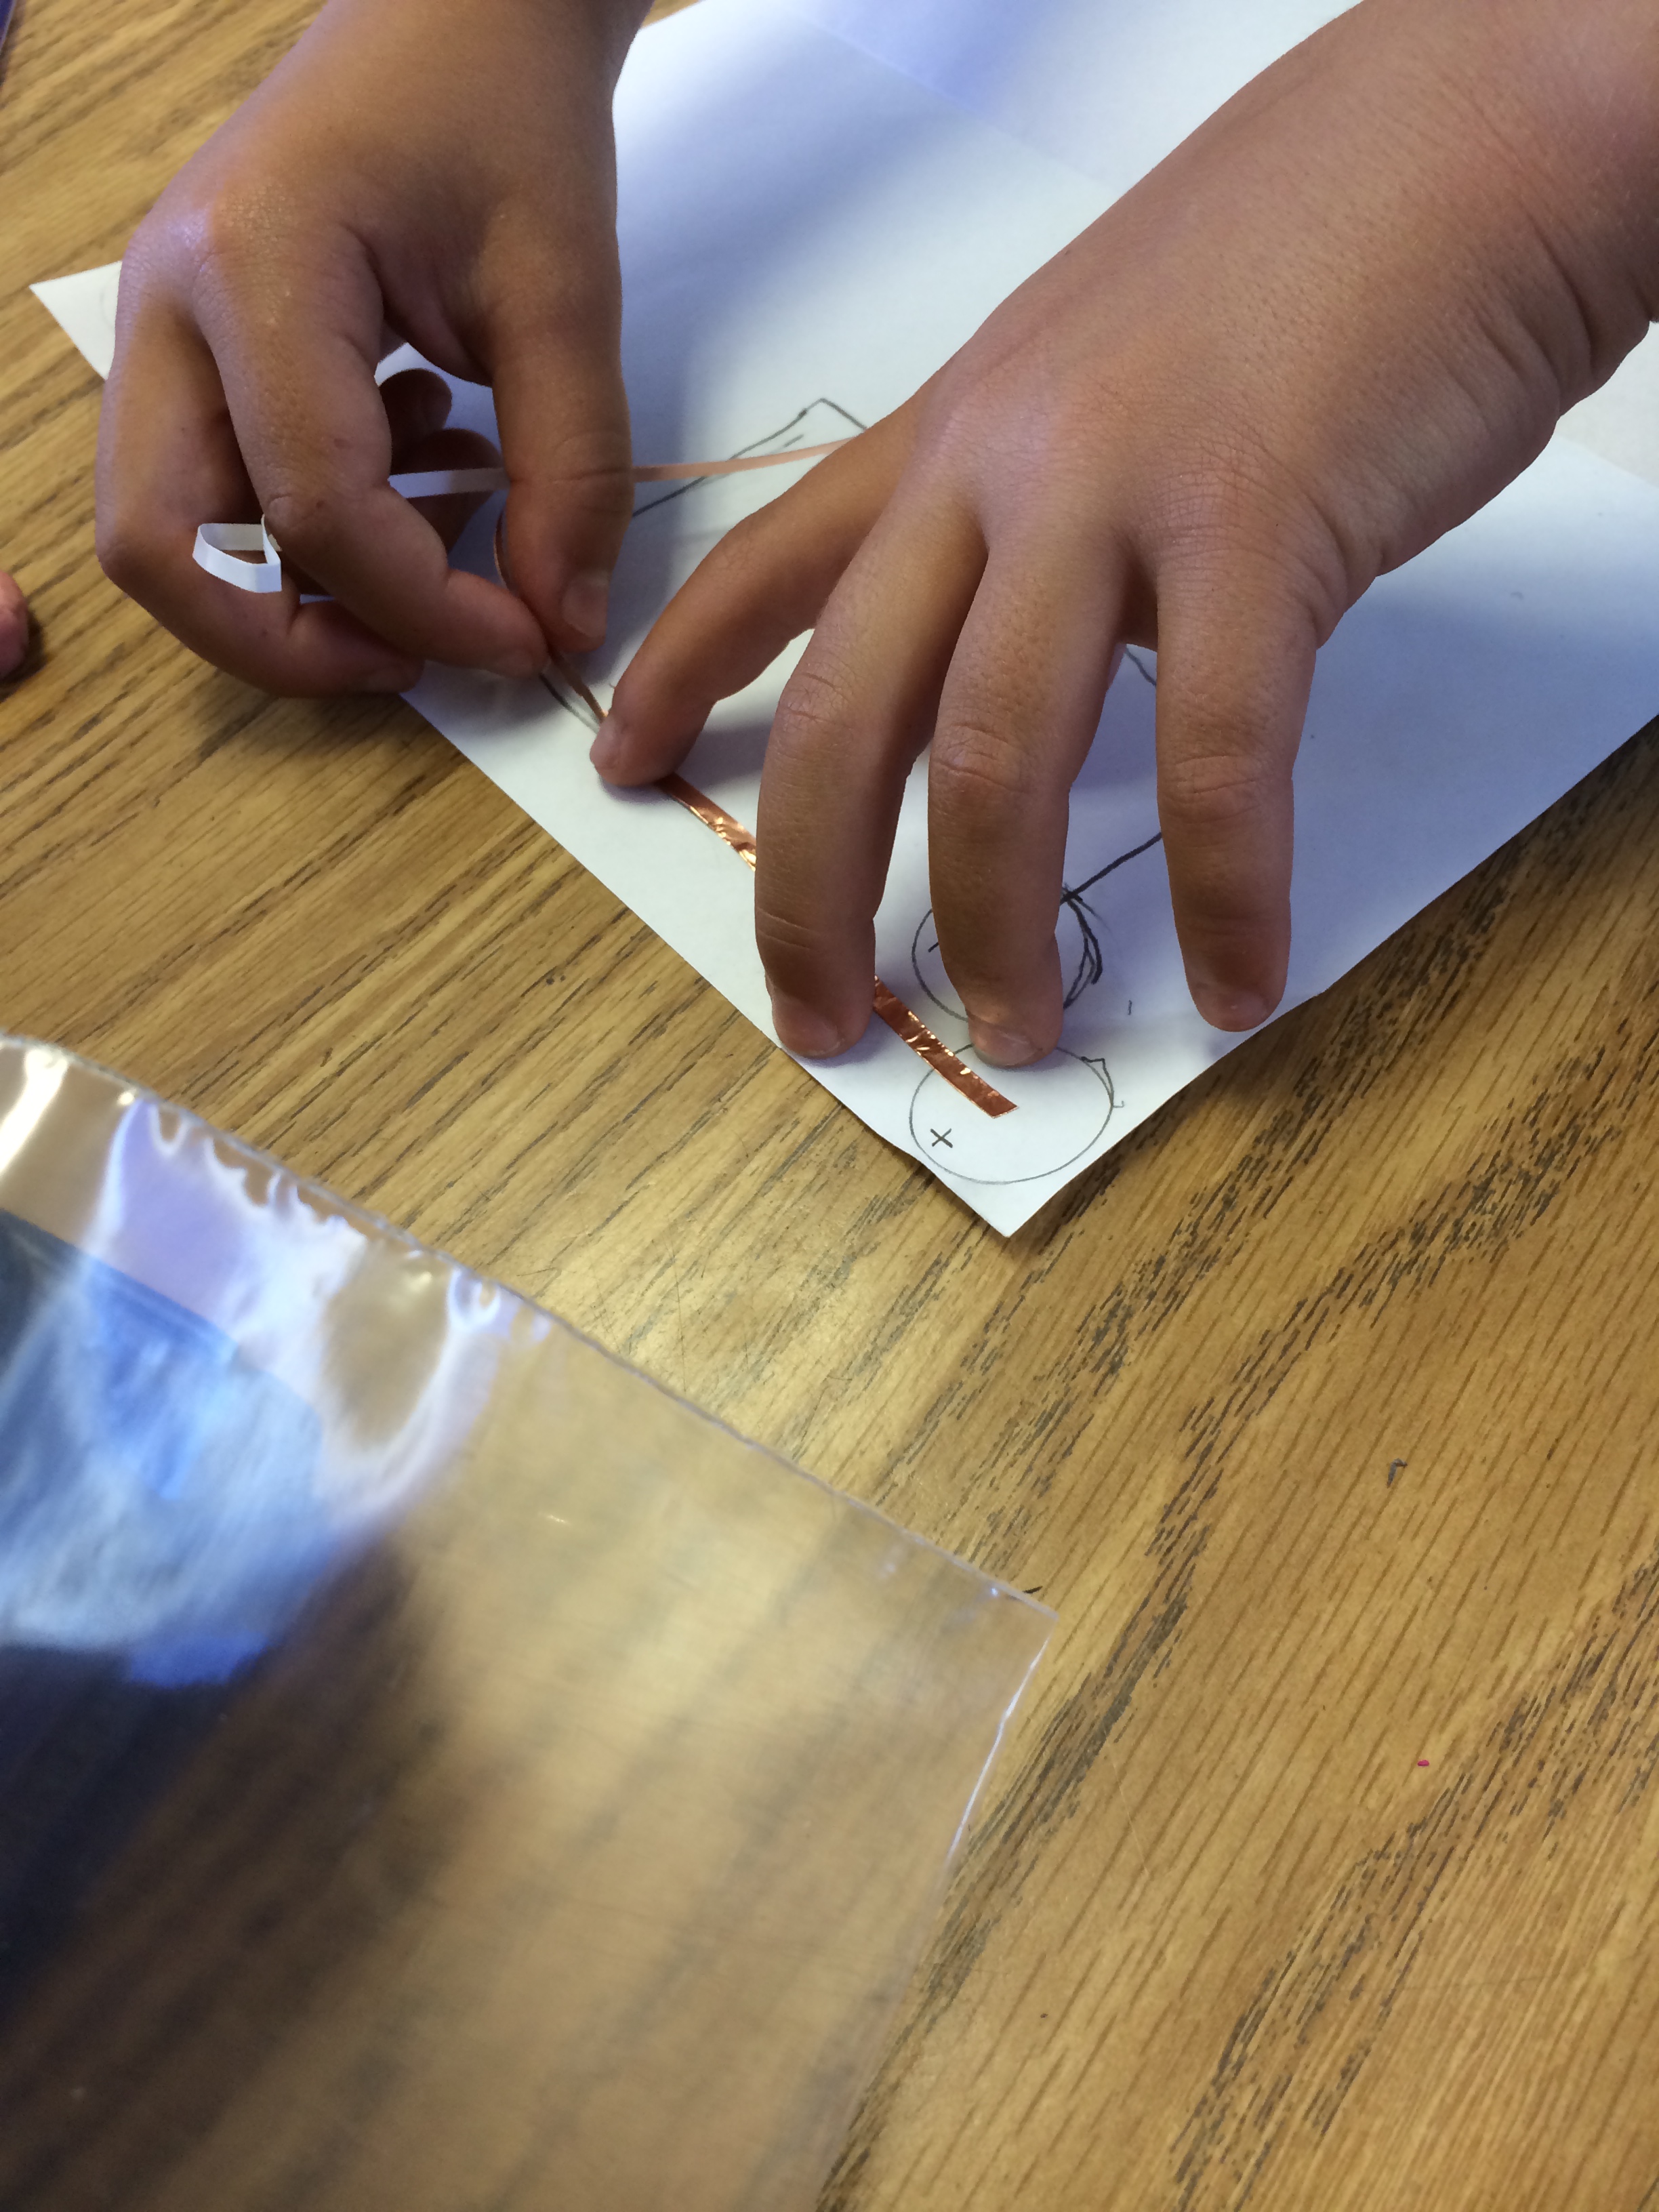
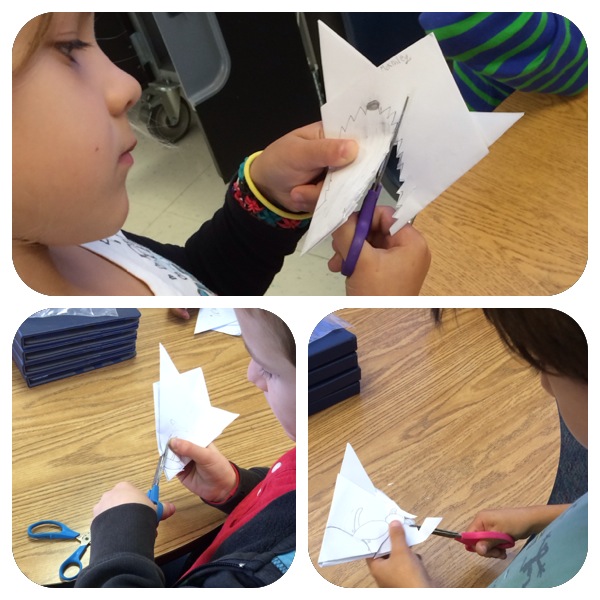
Thursday was the day that the kids got their hands on the copper tape and LED light stickers. Before they tackled creating their own circuits, I showed them how to work with the materials, how to make turns with the tape, how to use the stickers to measure how far to run their tape…and then they set off to work.

working with led stickers

guiding copper tape

The room hummed with the 43 six through nine-year-olds all focused on getting their circuits constructed with the tape and lights.  Many worked with a basic one-light circuit and a few brave students tackled a parallel circuit that included two lights.  When the first circuit worked, the entire room lit up with the students’ excited energy.

circuit success

But as you might imagine, every student was not successful on their first attempt.  We suspected we might have to deal with a few tears of frustration during the course of the project…but, although there was frustration, everyone kept at it, and the spirit of collaboration and encouragement could be felt across the room.  Some students became expert debuggers–and helped their classmates figure out why their circuit wasn’t working.  And my teaching partner and I also became experts, giving recommendations and helping those little hands that had trouble keeping their copper tape smooth and getting their battery lined up and clipped on.  Even before everyone finished, it was time to clean up…and we reassured them that we would return to the project the next day.

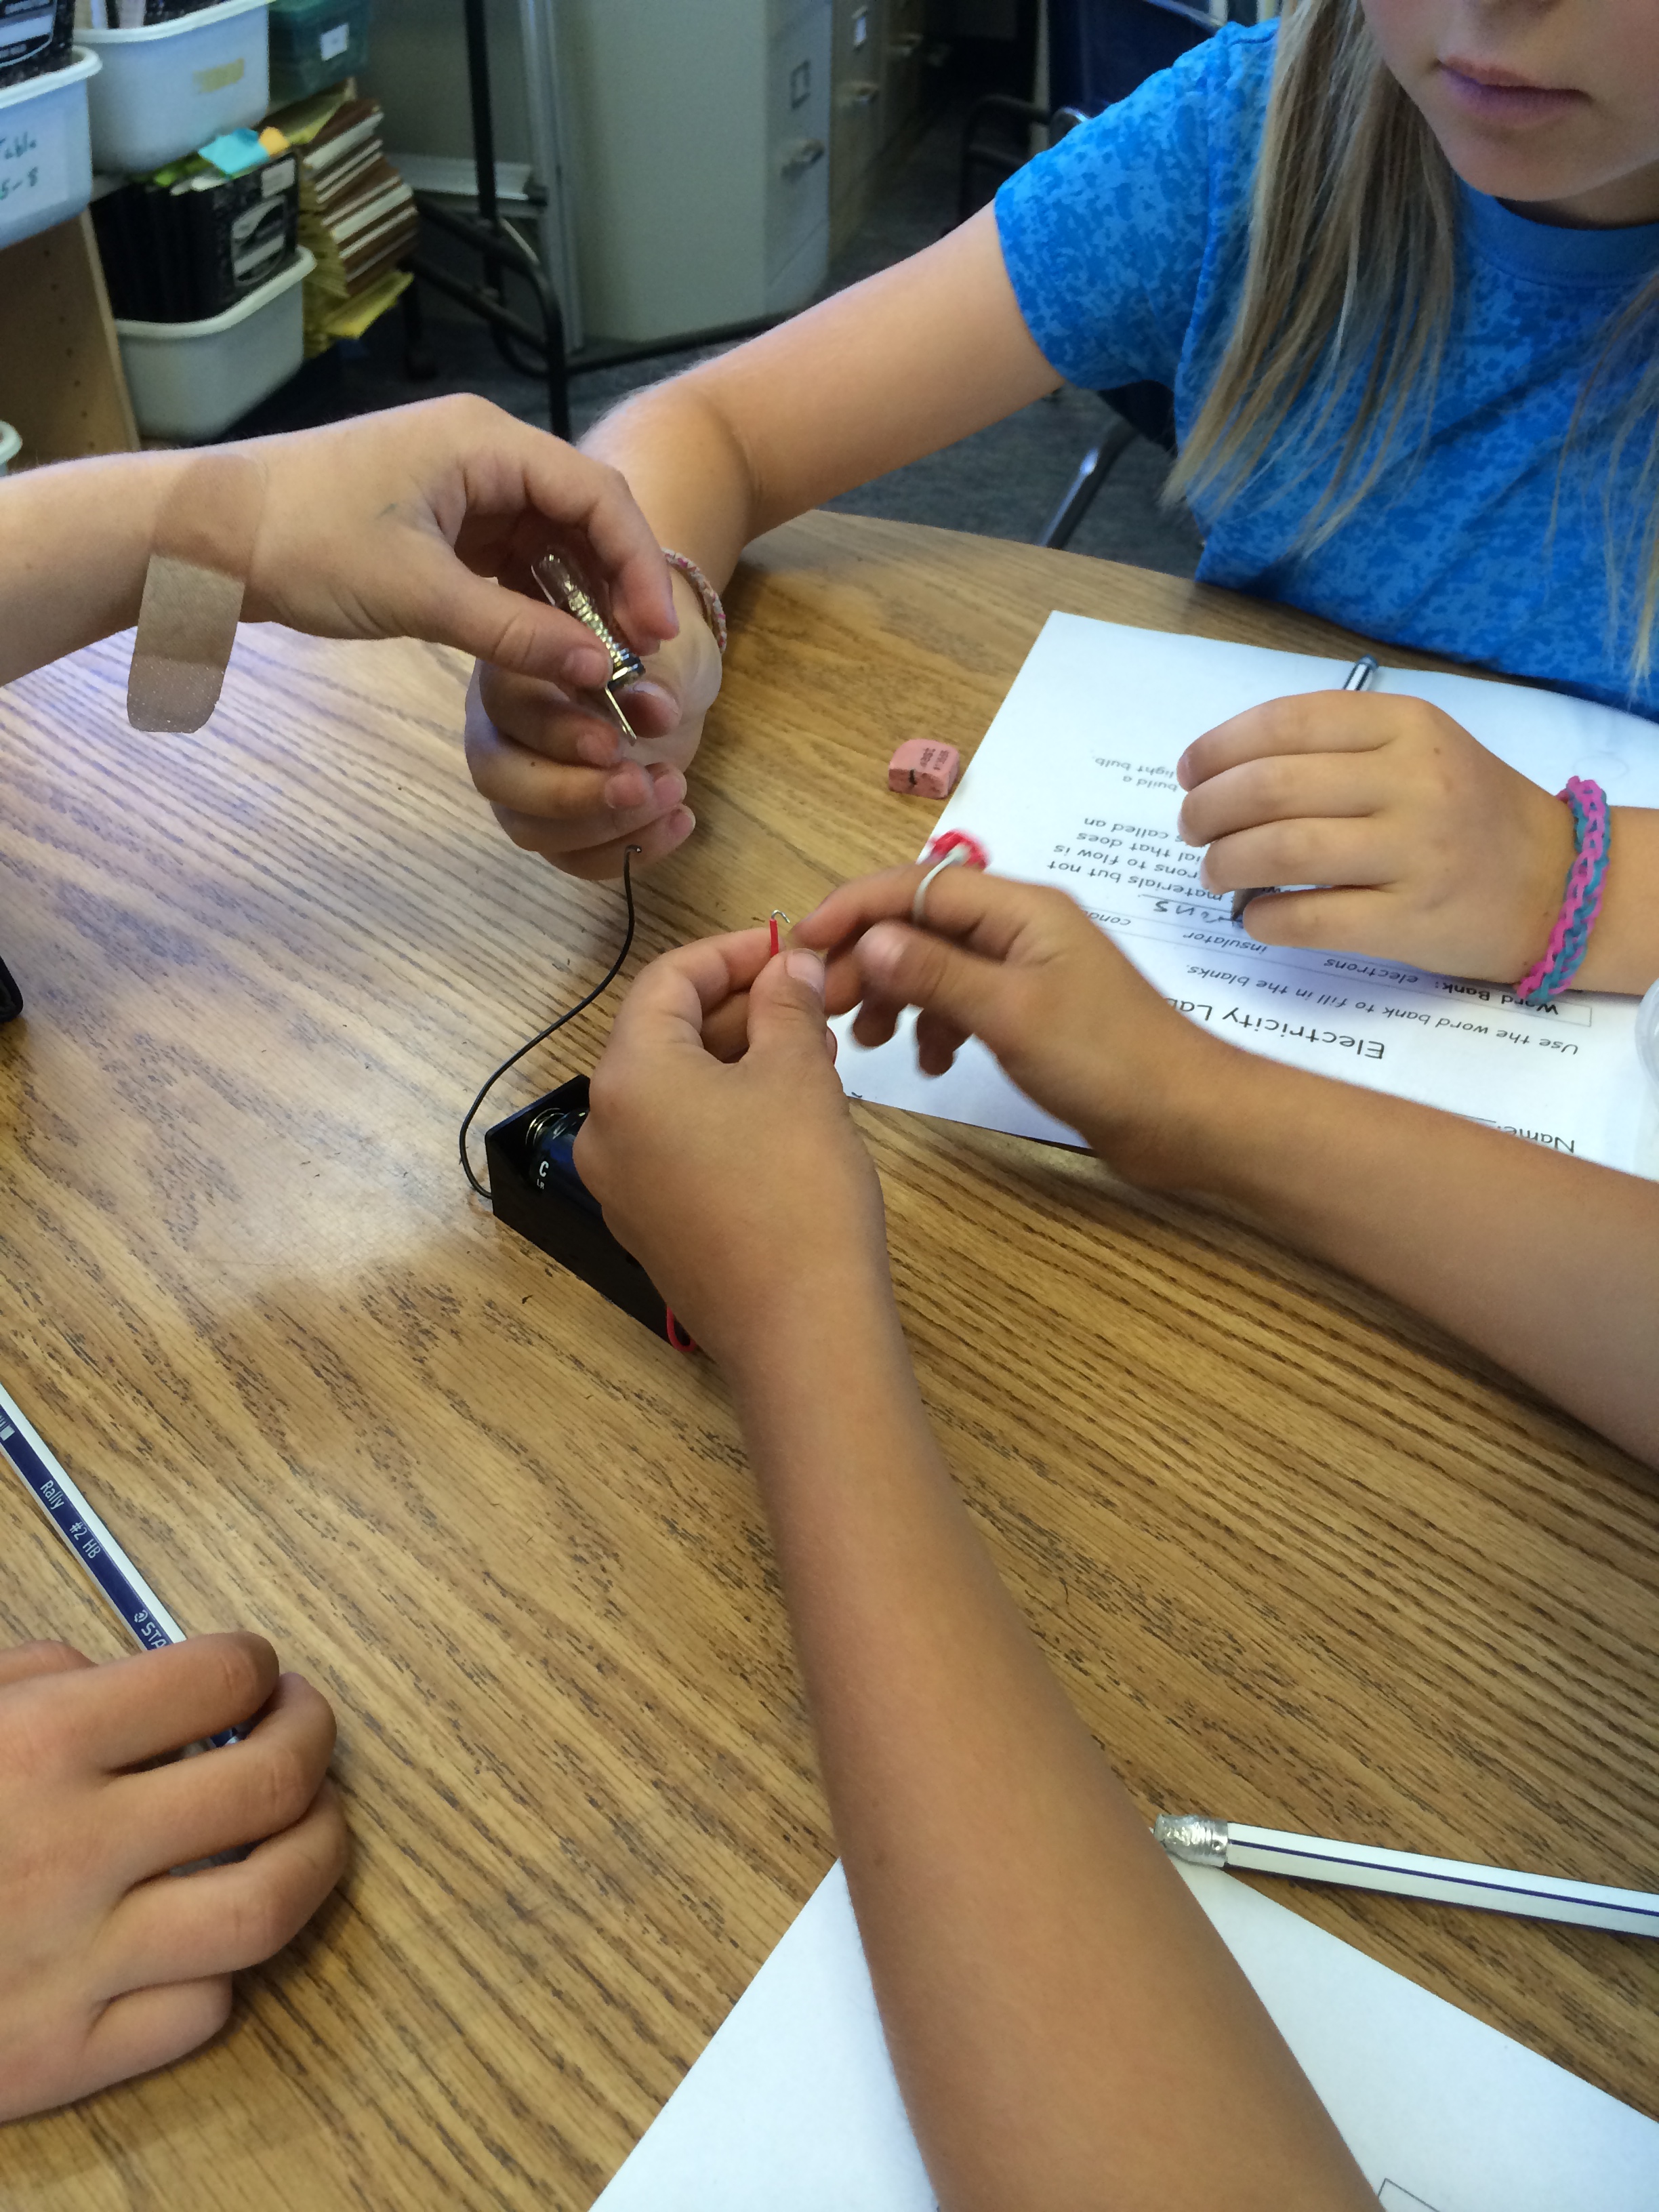
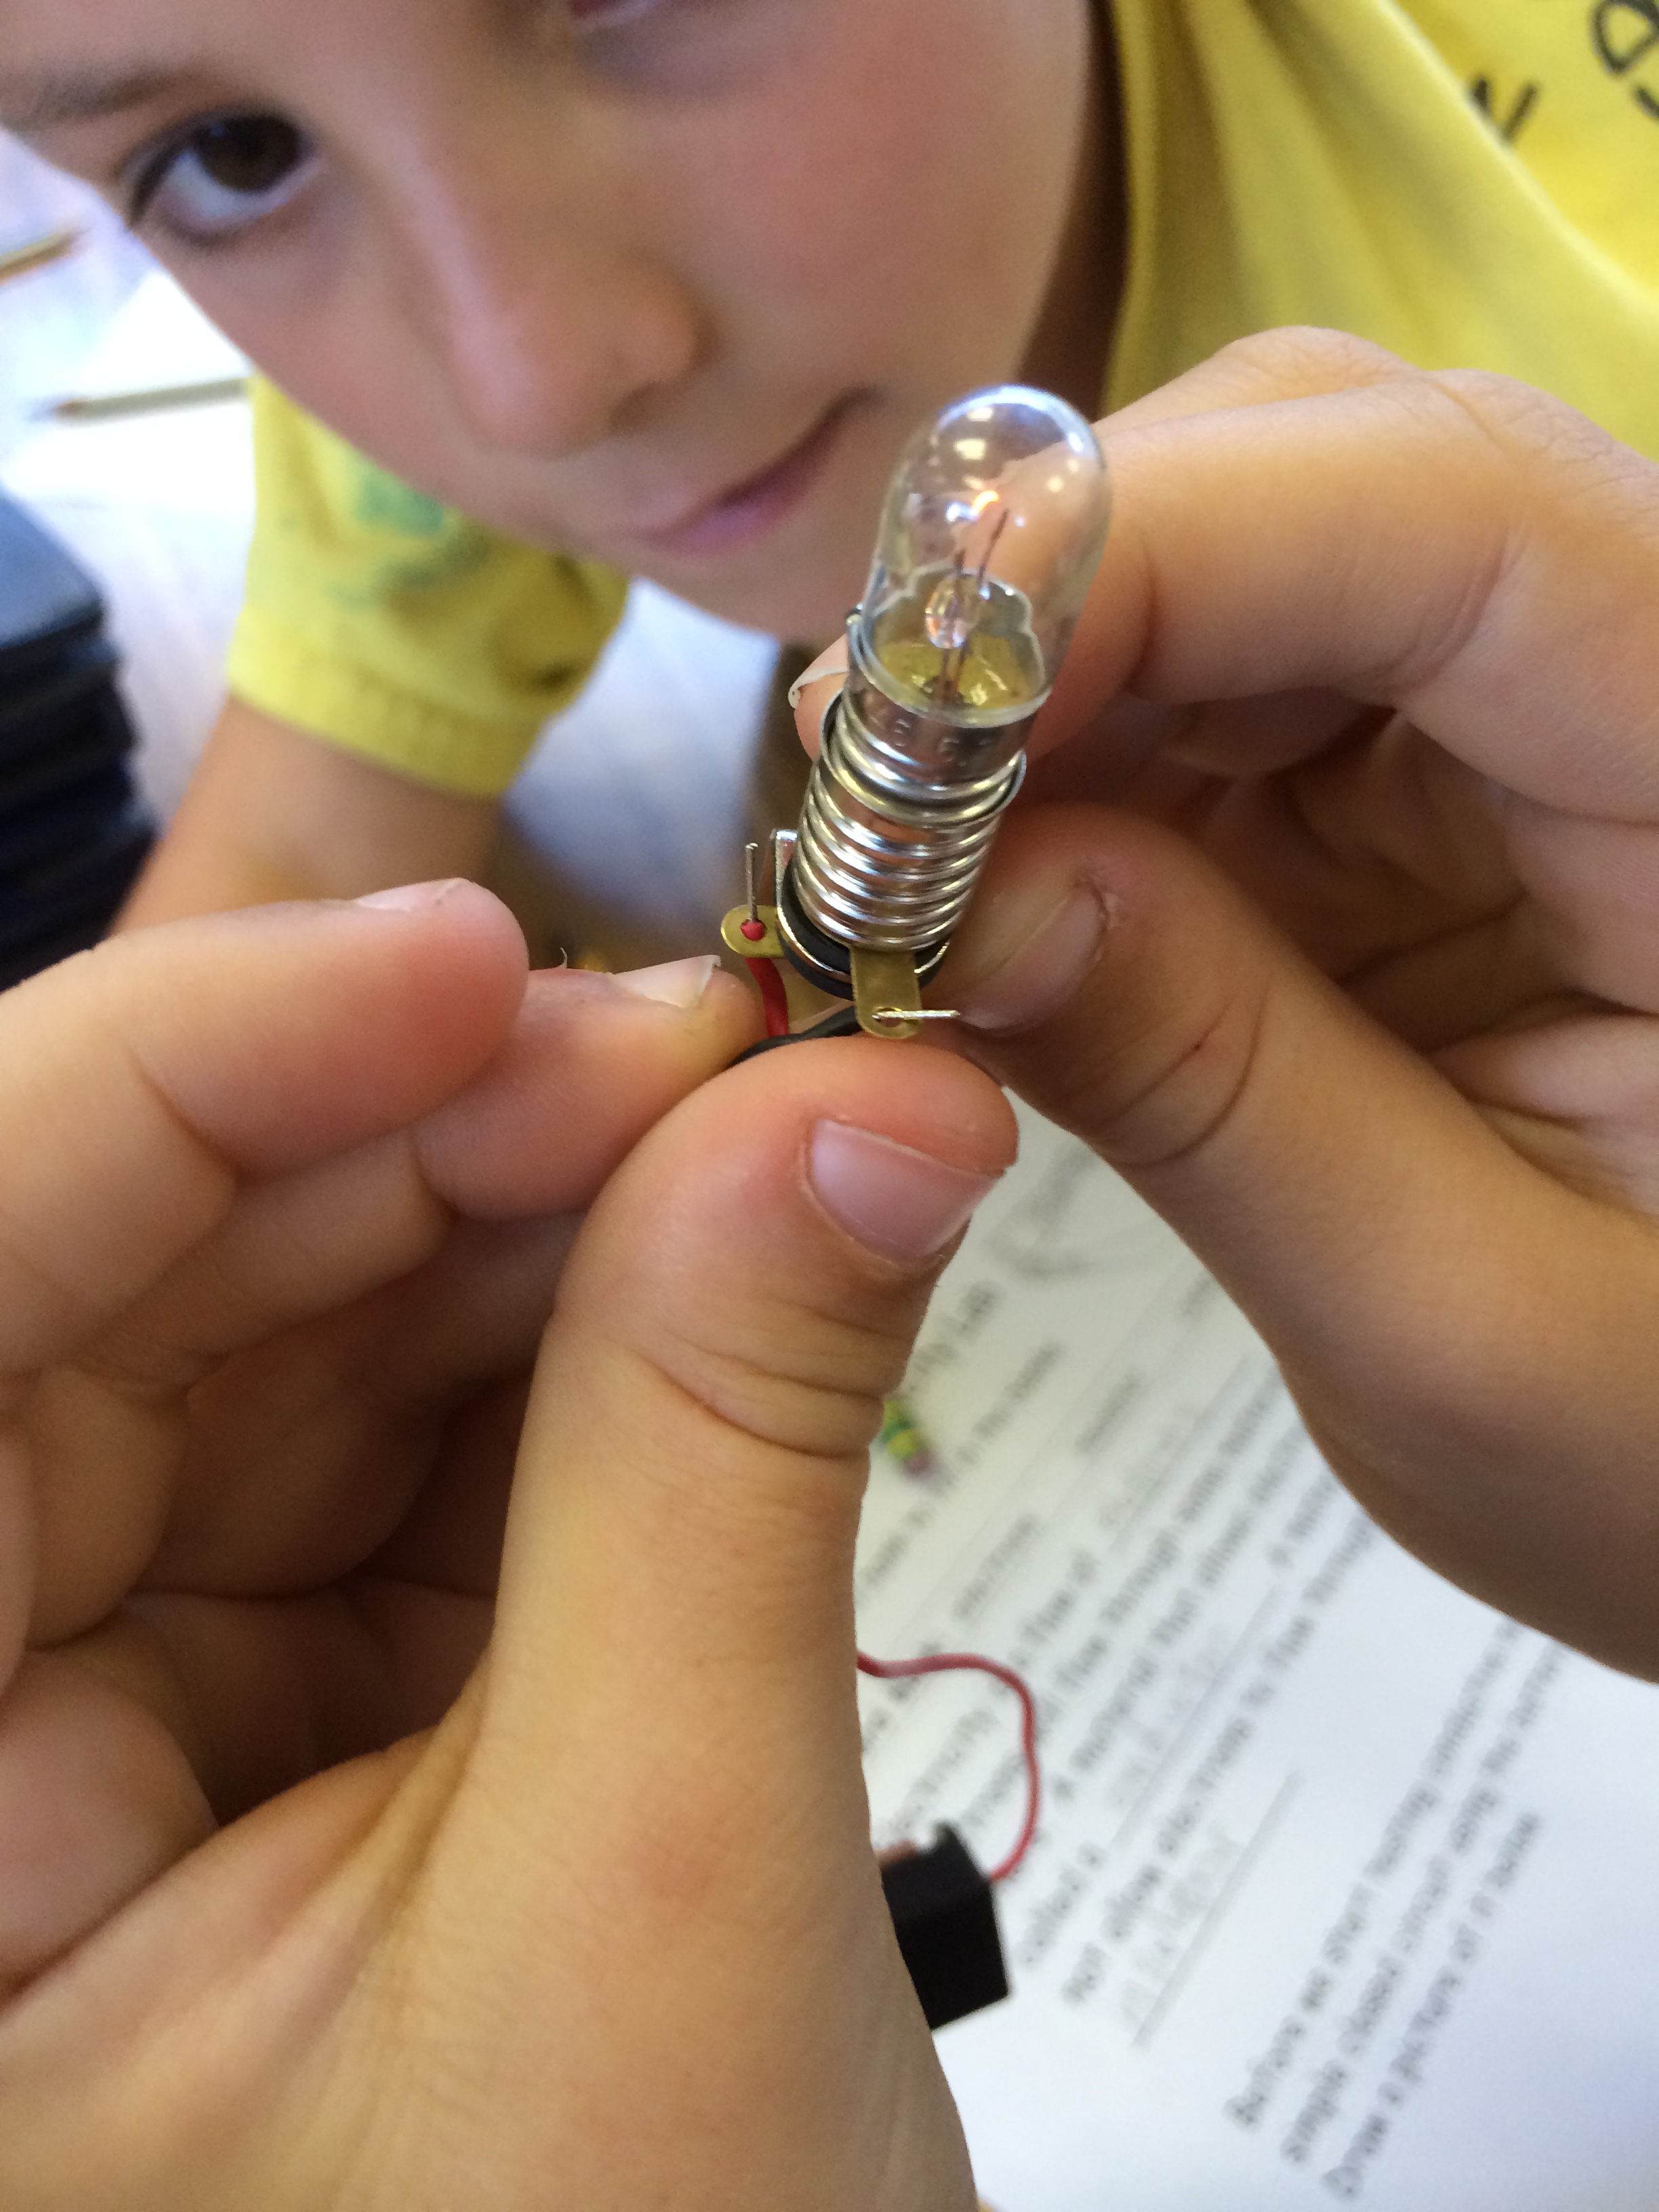
On Friday we were fortunate to have our school’s science teacher design a lab to complement our project.  She had students work in groups of four to attach components to make a circuit with an AA battery and battery holder, a light holder and a small incandescent light.  Because of their experience with the circuits in their project, this was a fun review for them…and they loved that they were able to get their circuits to work!

science lab with circuits

light

light with Joe

As part of the lab, they also explored conductors and insulators and noticed which materials allowed the light to light up and which interfered.  All of this was useful information as they returned to their circuit/notebooking project to problem solve circuit issues and continue with their art and writing.  By the end of the work period on Friday every student had successfully gotten their circuit constructed and their light(s) to work.  And we learned some important lessons along the way.  The stickers are pretty easy to work with, but grubby little hands can cause interference with the conductivity of the adhesive.  We had a few instances where we needed to pull the adhesive off and use tape to secure the sticker.  And sometimes our best approach was to peel the copper off and begin again.

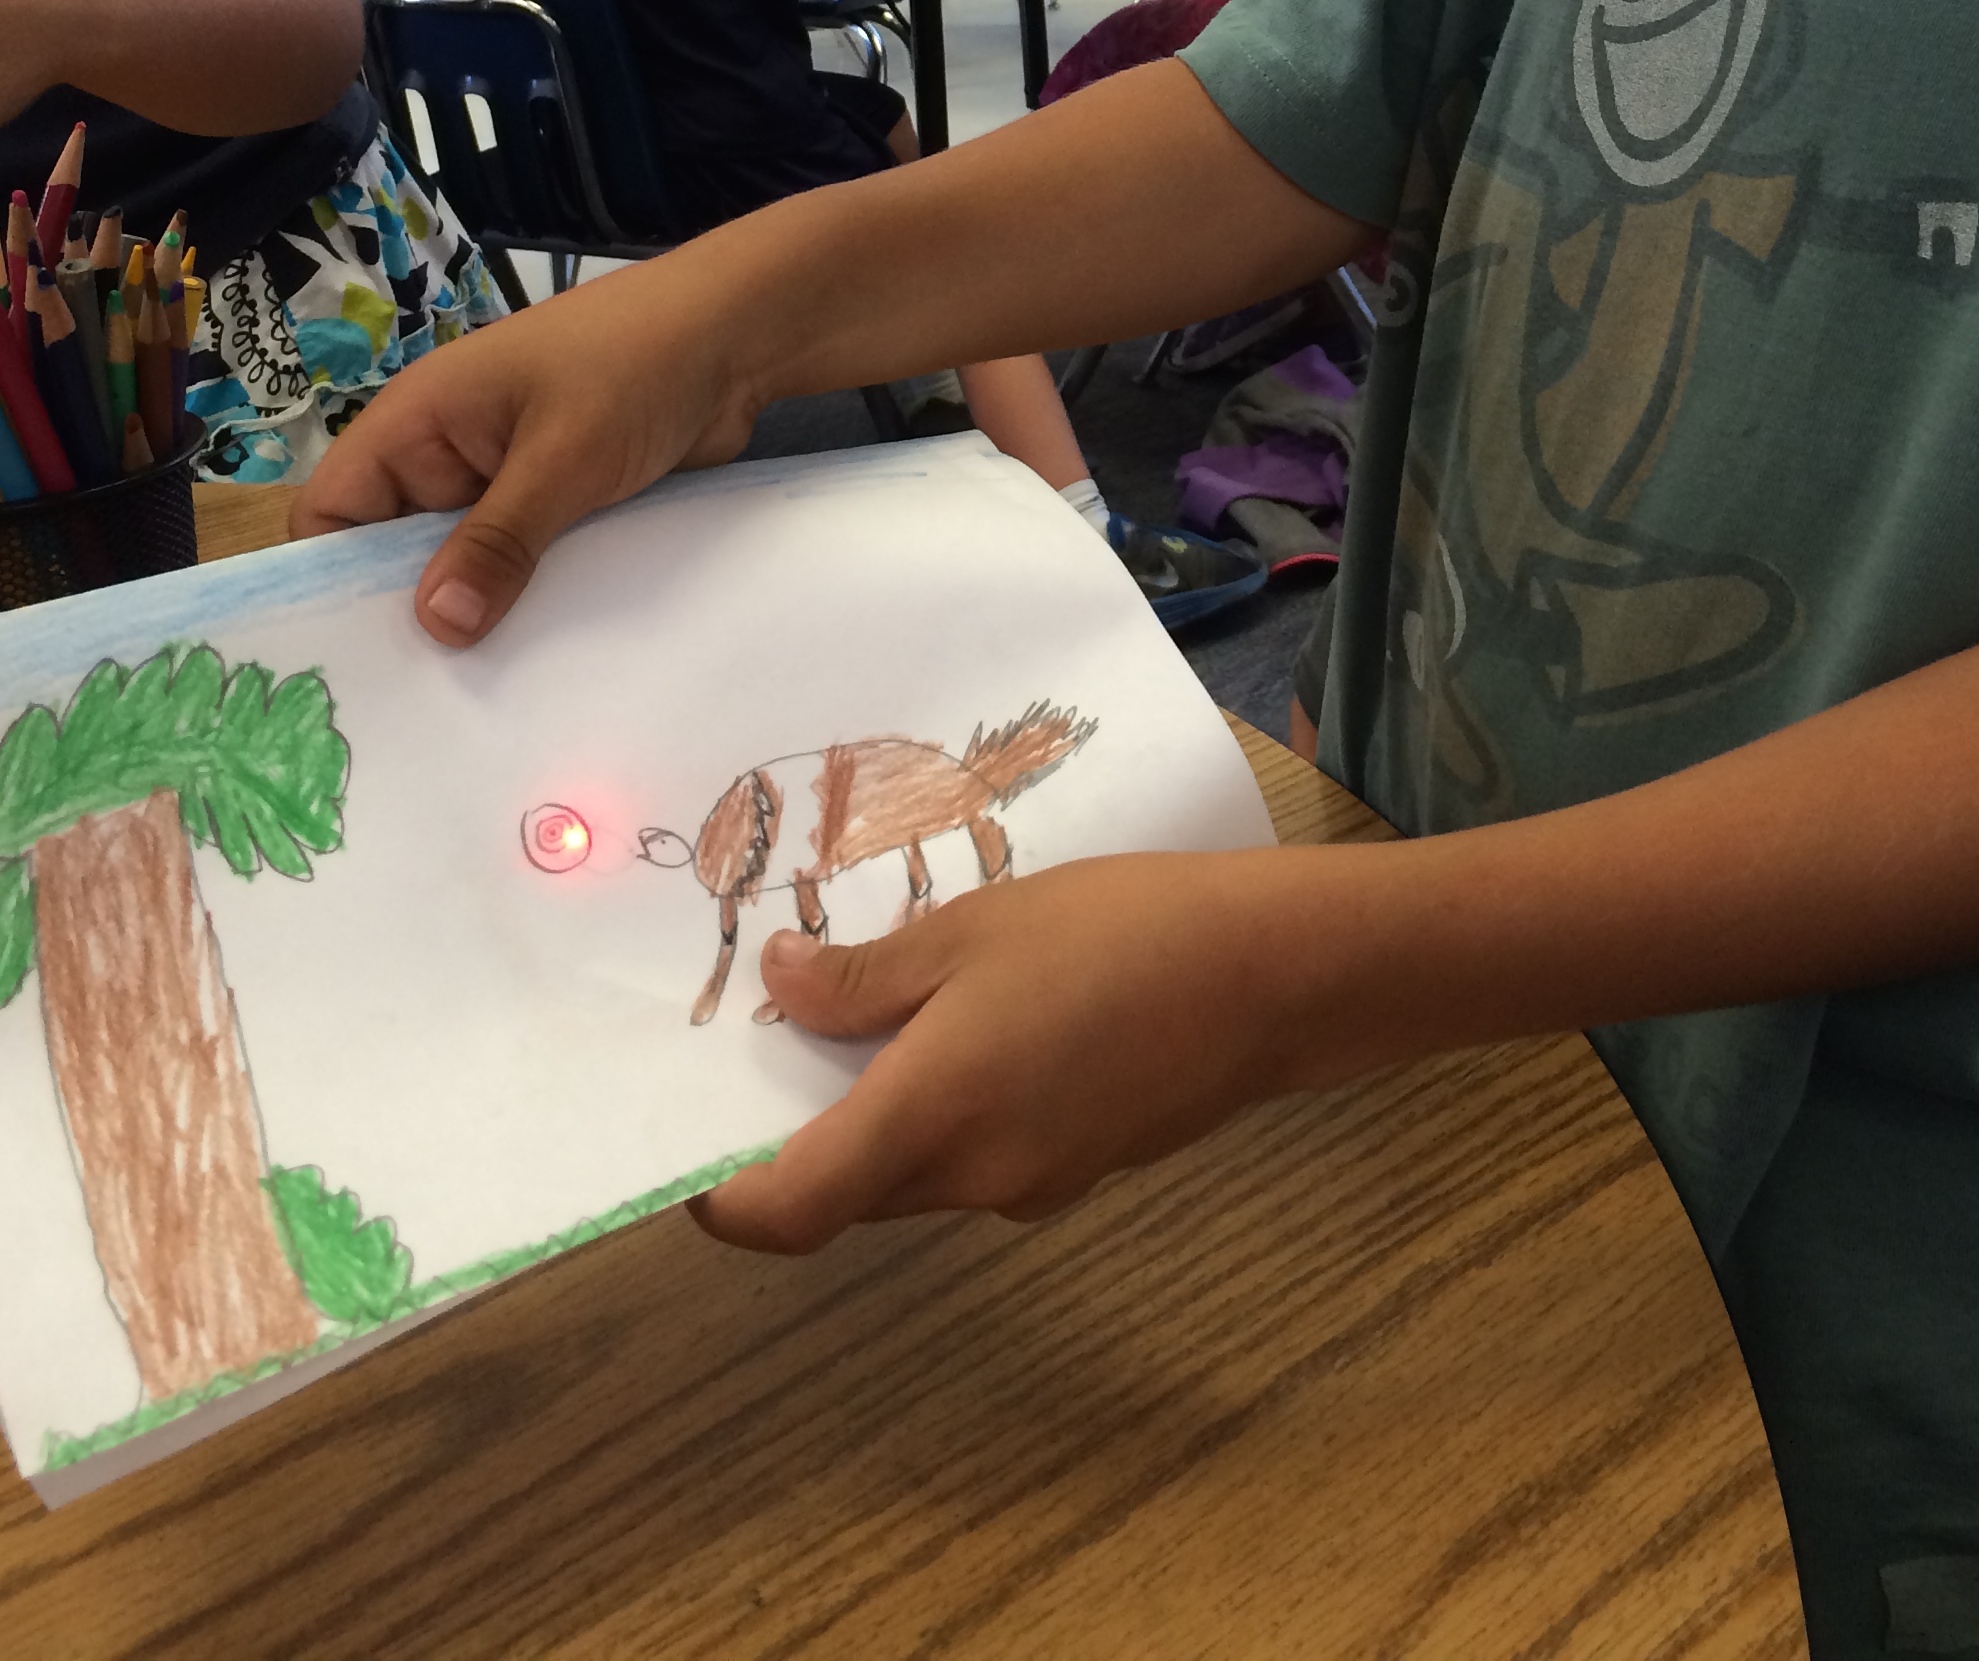
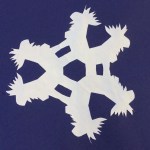
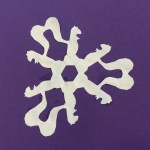
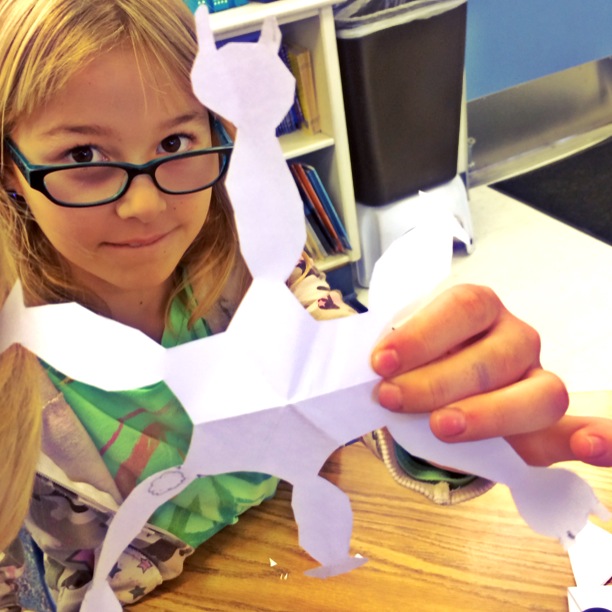
Here are few examples of student projects:

circuit project-CJ

circuit project sophie

circuit project-elke

circuit project_Eva

We still have some final details to complete…including some writing about the science learning that took place during the project. And students are anxious to get a closer look at everyone else’s projects too!  So this week we will take some time to concentrate on the finishing details and already have a gallery walk planned for students to get a close look at all the projects.  The kids can’t wait to take these projects home…but they will have to wait until after Open House later this month.  We just have to have them on display on that night to allow families to experience the “wow” factor in the classroom.

With all the work we have done with the power of iteration this year, I am wishing for some more LED stickers to allow my students a second chance to use these materials.  I am wondering what they can do and would do now that they understand the possibilities.  Maybe I can talk Jen and David into scrounging up a few more just to see what my students would come up with…

Making Time for Making

We’ve been doing a lot of making in our classroom this past week and a half.  Snowflakes, poinsettias, Hopscotch projects…  It’s not that we don’t make at other times, but it seems that we have really gotten in the flow of making lately.

I love it when we can give ourselves and our students the time to plan, design, improve, and finalize a project.  Our snowflakes were just such a project.  Math and science, reading and writing, along with problem solving and some systems thinking all came together to create animal shaped snowflakes that will be accompanied by original snowflake poems later this week.

I wrote about the start of the project here and the value of tenacity and iteration for students.  Our students had at least four opportunities to create their snowflake designs–with time to study their own and others’ attempts in between.  And yesterday, all of our students successfully created an animal-shaped snowflake of their own design.  (We did not provide templates, although we did help the few students who needed some additional scaffolding.)

Here are a few examples…and remember these students are 6, 7, and 8 years old!

If you look closely you will notice a moose, a giraffe, a squirrel, and a lizard in these four designs.

Students also created winter scenes using computer programming yesterday.  You can read about it here.  And then today, in addition to writing about snowflakes, we began assembling the poinsettias we are making from the paper we painted on Monday.

They still need their finishing touches…but already are beautiful!  And students have learned a lot about poinsettias and a bit about their history.  (The Ecke family, locals from our area, established themselves as primary producers of poinsettias around  the world!)

But what I love best about this making is the productivity and collaboration from our students.  They love making…and once they get past the fear of failure, are willing to take risks and try new ideas to improve their products.  And we see evidence of students taking these ideas home and trying them out there.

One of our students came in this morning with a huge snowflake…a good three feet across…that she made at home.  She had talked her mom into a trip to Michaels to get the big paper that she designed (a butterfly), cut and decorated…and then brought to school so we could see what she had done.

I know there are people who might call these activities “fluff” and complain that this isn’t real learning.  For those people, I wish they could see the energy and enthusiasm, the collaboration and problem solving…and all the reading, writing, math, science and history that are learned in the process of the making.

Have you made time for making lately?

Opportunities to Iterate

My teaching partner and I have been working with our students on coding this year (see here and here and here).  We’ve figured out how to make coding a regular part of our week…and our students are having success with planning, creating, and debugging.  We’re planning a “winter scene” challenge for next week to celebrate the Hour of Code…more about that next week.

Related to this coding effort is our goal of helping students to cultivate “grit” and to see mistakes as learning opportunities.  (See It’s the Little Things for more on grit.)

So this week in addition to our digital work as programmers, we have given students a design challenge…making snowflakes.

These southern CA kids have limited experience with snow (as do I), but learning about snowflakes is fascinating.  We started by reading Snowflake Bentley about Wilson Bentley–a man obsessed with photographing snowflakes using a camera attached to a microscope (back before the technology was very developed).  He showed a tremendous amount of tenacity and grit in his efforts…and finally published his book of snowflake photos when he was 66 years old.

We knew that creating hexagonal snowflakes (by cutting paper) would be challenging for our students, but we decided that this purposeful opportunity to iterate…study mistakes and learn from them for their next attempt, would be a perfect platform for helping to build grit and tenacity.

And then to add to the challenge, inspired by Zoo Flakes ABC, our students are creating hexagonal snowflakes in the shape of animals.  Yesterday they learned to fold and began drawing their animal to cut.  Today they tried out their design by cutting out their animal. There were many failures–unconnected pieces that looked nothing like animals or snowflakes, whiny “this is hard” comments, and requests for help cutting (we deferred, reminding  them it was a perfect opportunity for practice).  There were some semi-successes with 6 intact “arms” of something like an animal shape.  And there was lots of concentration and studying of the results.

photo

photo-2

We studied our successes and failures…and then looked at some more “expert” attempts online.  We considered ways to improve even those attempts that were “successful” (in the sense that a snowflake-like shape resulted).  And students are ready to try again tomorrow.

But best of all there were no tears and everyone gave it a try today.  Our students were focused on their design and their cutting…and desperately want their snowflakes to work out.

photo-3

We’re excited about this project…and all that our students will gain from these iterative efforts.  I’ll let you know more as we progress through this project!

What do you do to help your students study their mistakes and try again?

Tinkering with Design

Tinkering…  My students experimented with design this week…and then tinkered with their design after talking about it with their classmates.

Based on a nonfiction article about how zoos are experimenting with keeping their animals stimulated–including designing toys based on animals’ natural behaviors, we invited our students to try their hands at designing a toy for a favorite zoo animal.

They drew and labeled and explained their designs.  And evaluated their own and classmates’ designs by asking a few questions:  Is it safe for the animal?  Are the size and materials right for the animal?  Is it fun for the animal?

And then, with feedback in mind, students returned to their designs again…and created a new iteration.  They either started from scratch or improved on their original design.  This design was created by a six-year-old with an elephant in mind!

photo-2

I’m looking forward to our next tinkering opportunity–when students will take some materials and design a “thing” from them.  I can’t wait for them to start making!

The Silent Hand of Design: August’s Photo-a-Day Journey

I’m now just a few days away from a full year of participation in photo-a-day.  This daily practice of taking intentional photographs and posting each day has had a profound effect on my photography skills–and on my powers of noticing in the world.

For the last few months, my #sdawpphotovoices friends and I have been exploring different prompts to push our creativity.  We’ve been inspired by Picasso and Neil Gaiman and last month we spent each week focused on a single color.

I recently came across this Ted Talk by Rob Forbes who talks about design within reach.  He takes about 5000 photos each year, capturing interesting design elements.

I love the idea of the silent hand of design uncovered in the photos he takes.  Unexpected patterns and textures, angles and curves, symmetry and technology pop up in our everyday lives when we take the time to look.  Forbes suggests that the first job of design is to serve a social purpose and that the best design preserves diversity and culture.

For the month of August, let’s focus our photography on design.  Each week we will focus on a different element…and at the end of the week we’ll reflect on our photographs and curate our own observations and learning.  (I am cross-posting this at SDAWP Voices where Barb will create a link up for us each week)

photo-4

Take a picture each day that somehow captures the design element and post it to Instagram, Twitter, Facebook, or Flickr using the hashtag #sdawpphotovoices.  (You can post anywhere—if you want others to be able to follow your photos, Instagram and Twitter are best!)  For more information about posting click here.  At the end of each week let’s add an additional challenge:  curate your pictures from the week and select one to highlight.  You might post it on your blog along with some musings about why you selected it.  If you don’t have a blog of your own, you have a couple of choices—you can create a blog (be sure to share it with us by including your blog address in the comments here—or better yet, tweet it using the hashtag #sdawpphotovoices) or you can post to the SDAWP Voices blog.

August 1-4:  symmetry

August 4 or 5: reflect on your week and share your thinking and picture (or collage) on the link up

August 5-11:  curves

August 11 or 12:  reflect on your week and share your thinking and picture (or collage) on the link up

August 12-18:  angles

August 18 or 19:  reflect on your week and share your thinking and picture (or collage) on the link up

August 19-25:  patterns

August 25 or 26:  reflect on your week and share your thinking and picture (or collage) on the link up

August 26-31:  repetition

August 31 or September 1:  reflect on your week and share your thinking and picture (or collage) on the link up

As an extra invitation, at the end of the month, pick your five favorites to inspire a bit of writing or art or something else you want to make.  Be sure to share your creativity and what you discover through the process.  I can’t wait to see what our focus on design elements will reveal!

Does Design Matter? A Terminal Walk

A week or so ago Bart over at the #clmooc shared this blog post about classroom design and it’s impact on teaching and learning.  Yesterday I spent the day traveling from New York back home to San Diego and in the process spent time in three airport terminals.

Since I had a layover at Chicago’s O’Hare airport, I took the opportunity to take a short learning walk to give myself the opportunity to think about my experience through the photographs I took.

Airports are funny places.  Institutional, highly regulated, and not terribly comfortable.  The food is pricy—and not usually all that good, the restrooms are not as strategic as we would wish, and there are never enough plugs to recharge those electronics that are so necessary these days.  And yet, as travelers we spend significant time in these places.

As I walked through the terminal I noticed the usual features—the Starbucks, the strategically placed trashcans, and the lettered and numbered gates.

And then I looked up.  I noticed the green glass (or plastic or Plexiglas) on the ceiling.  In some places the same design was yellow and others more of a tan color.

photo

Down the main corridor looking up meant seeing flags from countries all over the work—and a world sculpture all under the latticed ceiling that lets natural light into the terminal.

flags

I saw plenty of vehicles of the golf cart variety.  Some were moving with flashing lights and beeping noises as they transported travelers who needed some extra help getting from gate to gate.  I also found a place where three vehicles were parked…and loved watching the little boy “driving” the one with the awning.

cart

The chairs designated for those with physical handicaps were red in this terminal.  I did notice right away that they were different from the other chairs.

chairs

I also noticed some new, more unusual design features.  There were the walls of plants on either side of a bank of chairs facing the windows.  A closer look revealed that they hold potted plants arranged to fill both sides and the top so it looked much like a shrub.  I also saw the interactive big screen game…challenging those who pass by to try to beat the latest fastest time.

plant wall

game

These last two features remind me a bit of a hamster cage with the wheel for exercise or a fish bowl with the castle to make the glass bowl seem like an undersea world.  They are still containers meant to keep the pets both healthy and restricted, but probably serve the pet owner more than the animal they hold.  The plant wall and the interactive game don’t change the terminal experience, people are still contained inside the terminal building–and often experience boredom associated with waiting and waiting…

These props seem almost like bean bags in the classroom for reading.  They make things a bit more comfortable, but don’t fundamentally change the experience of the space.  Bart talked about the workbenches he wanted for his classroom–to shift the experience for learners from recipients of knowledge to makers as learners.

I’m thinking about the ways the design of spaces impact our actions, our feelings, our experiences.  What are the implications for classrooms?  For airport terminals?  For living and learning?